HAIR TUTORIAL: Mad Men Inspired hair.
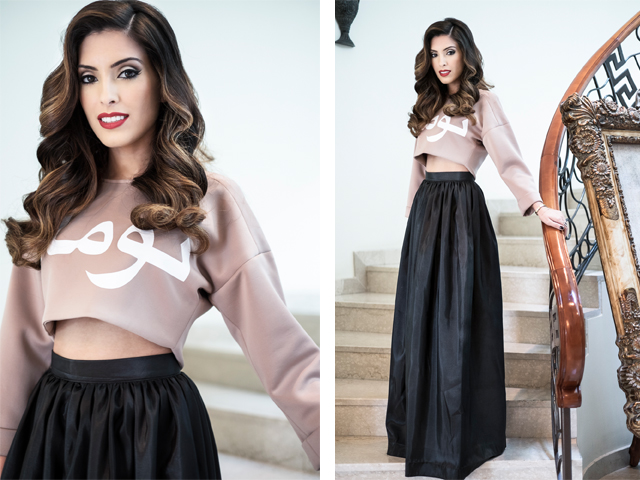


Top by House of Nomad. Skirt by Bel & Beau
I’m all over Old hollywood glamour & Mad Men inspired hair so this month, I teamed up with Eideal to get the look at home. Late 50s/early 60s hair is having a real revival at the moment thanks to the seriously enviable tresses sported in TV shows such as Mad Men. Whilst pristine, vintage waves may look dauntingly difficult to achieve, I have found a technique that’s actually simple to master and oozes this era’s grace and femininity.
What you will need to complete the look:
Kerastase Lacque Couture Hairspray
Heat Protection Spray
Kerastase Lift Vertige for Volumizing
Sectioning Clips
eionic Hairdryer
Evolution Brush
Tail Comb
Cut Comb
eCURLER Small-Barreled Curling Tong
Step 1 (The Voluminous Blow-dry)
I begin to blow-dry my hair in sections using the technique I described in my Perfect Blow-dry Tutorial, but this time I’m looking to create some extra volume for this glamorous, vintage-inspired look. So, I prepare the wet hair using a volumizing product and my chosen heat protection. I begin at the bottom and work my way around my head, using my Evolution, Teflon-coated Brush to lift each section at the root with the airflow angled down towards it for a few moments. Evolution Brushes feature super-strong, ionized bristles which are perfect for creating some extra lift and movement – a perfect starting point for creating this fabulous style! I finish by sealing the cuticle with a blast of cool air and allow my hair to completely cool down before moving on.
Tip: This is a great technique for those with fine hair who want to add additional volume to their usual blowout.
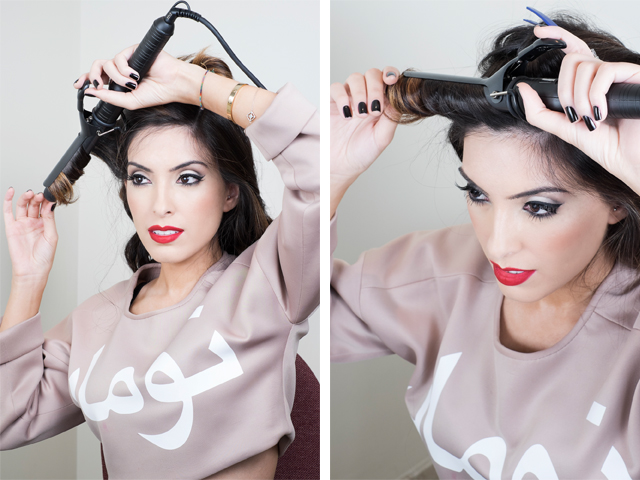
Step 2 (A Deep Side Part)
I then create a nice, deep side part using the end of my Tail Comb. Sirens such as Audrey Hepburn and Sophia Loren were rarely seen without a heavy side parting; it’s sultry and gives the illusion of extra volume. The wave will not look as effective or hold as well when styled with a middle parting. Once the parting is in place, I pin up the top half of the heavier side of my hair (see photo2).
Step 3 (A Tight Curl)
Now it’s time to curl. The idea is to create an identical pattern across each section of the hair and develop a continuous wave. I start to curl the section just above my ear (see photo 3) and wrap the curl forwards, towards my face. For this tutorial I’m using my 25mm barrel eCURLER. I have purposely opted for a fairly small barrel size as I intend to spread the curls out later and a tighter curl has better staying power! The eCURLER heats up to 230° and is coated with nano-titanium and nano-silver which really helps to set the curl without damaging the hair.
Step 4 (Repeat)
I now repeat the same curling process, working my way around the first half of my hair. It’s important that each section falls right next to the other and has the same shape. If the curl pattern isn’t perfect I stop and re-curl that piece again until it is!
Step 5 (Ringlets!)
Now I change sides and repeat my curling technique. I keep curling, following the same pattern. At this point you might notice that your hair is hanging in tight ringlets, don’t worry! It’s supposed to look like that!
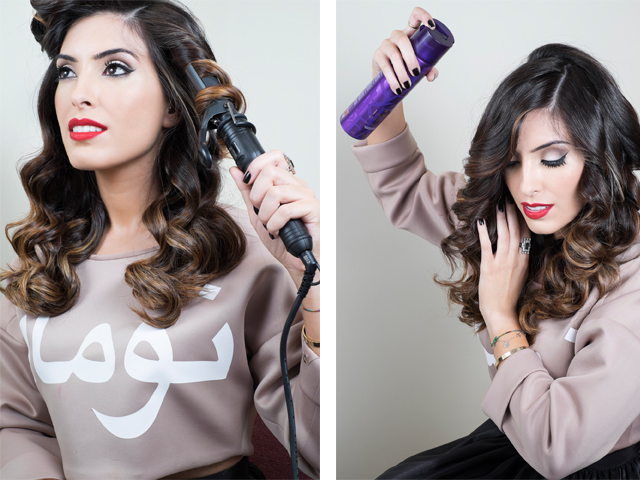
Step 6 (Secure with Spray)
Now that I have a full head of curls it’s time to spray them. For this style I work with a super-hold hairspray as I will be manipulating and loosening the curls, which can cause them to drop out if they’re not secured. It’s better to opt for a high-quality spray that can be brushed – crusty curls are not a good look! I then wait for my style to set in a cool and dry room; this should take about five minutes.
Step 7 (Comb the Curls)
Once I’m satisfied that my curls have cooled down I take my Cut Comb and gently start to comb through the curls. As I comb around my head, I notice that the curl pattern starts to join together. I continue to comb my way around my entire head, adding a little extra spray if necessary.
Step 8 (The Finishing Touches)
After combing through all of my curls I can finally see my vintage waves! To complete the polished style I take my eCURLER and curl under any straight/stray ends and allow my hair to completely cool down. Then, I spritz one last mist of hairspray and my vintage waves are good to go!
Tip: Always wait until the hair has completely cooled down before adding hairspray. Spraying hot hair will cook the spray into your locks and cause it to become brittle and dry.