HAIR TUTORIAL: How to get the Perfect Blow Dry.

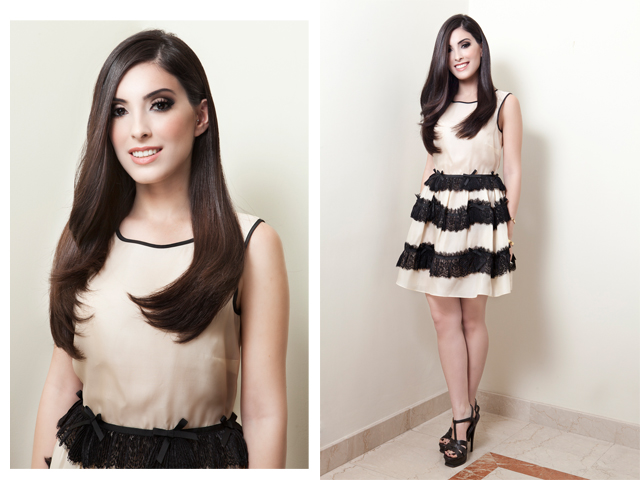
Thanks to Hannah Lisa for the beautiful Make up. Check out her work and details here.
Dress by Valentino RED available on stylebop.com
Photos by Chris Calumberan
& special thanks to Laura Beaney and Mike Toro.
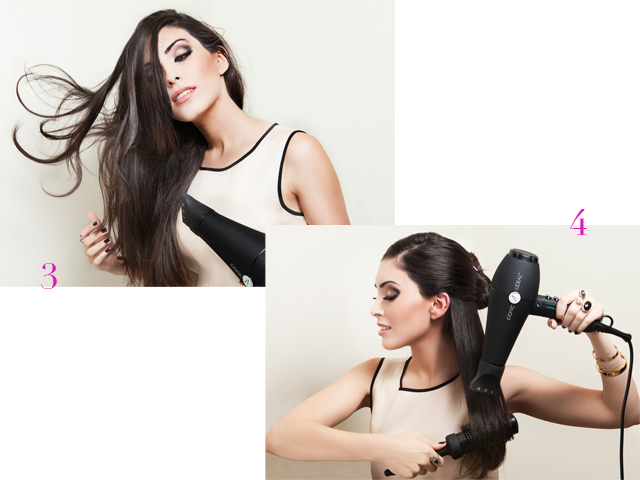
We’re back with the next Hair Tutorial in collaboration with Eideal Online. This month, I’ve gone back to the basics to show you how to get the perfect blow dry (couldn’t resist not doing a Festive hairstyle for December though!). Check out the step by step guide (visuals above, and text below) on how to get that sleek blow out.
There’s no better feeling than facing the world knowing your hair looks fabulous thanks to the wonders of an expert blowdry, but with today’s hectic lifestyle a morning in the salon is often impractical. Although it might seem like one of the more basic steps in a not-so-basic beauty routine, an at-home blowdry that yields a professional finish can be a daunting task, especially for those with thick or wavy hair. So to help you have fabulous hair without venturing outside your home, I have created your step-by-step guide to help you master the basic blowdry!
Concept:
A basic step-by-step blowdry guide that will form the basis for more advanced hair tutorials.
What you will need to complete the look:
Hairdryer with nozzle attachment
Tail comb
Leave-in conditioner
Argan oil serum
Paddle brush
Medium ceramic round barreled brush
Sectioning clips
Step 1 (The correct shampooing procedure)
A bouncy blowdry begins with a clean mane! Ensure your hair is squeaky clean by shampooing twice. Focus on the roots and scalp, the shampoo will work its way down the rest of the hair and clean it automatically. I recommend using a high-quality, sulfate-free shampoo to maintain the hairs’ natural oils and shine. After rinsing out the shampoo, condition it. I distribute the product between the mid-sections and the ends, making sure I avoid the scalp as this can add extra weight to the hair and give a nasty, oily effect! I pay extra attention to the dry/damaged areas as they need a little extra nourishment!
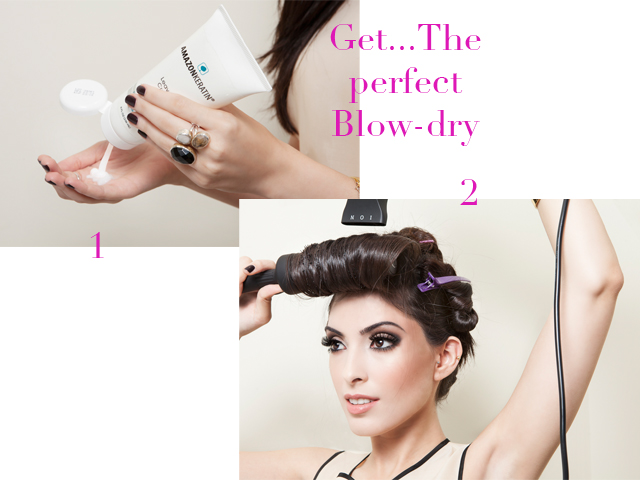
Step 2 (Product preparation)
At this point my hair is clean and ready to go. Working with wet hair, I take a small amount of leave-in conditioner and gently rub it into the ends. This protects my hair from the brushing and heat, as well as loosening up any stray tangles I might have. I then detangle with my paddle brush – this prevents breakage and damage when we start to blowdry.
Tip: A good hairstyle requires good tools so it is important to work with a high-quality brush and dryer! Curly and frizzy haired girls will require a round brush with strong bristles to achieve tension when it is pulled through the hair. Brushes with a larger diameter will achieve a straighter effect whereas smaller diameter barrels will create a more curly/voluminous look. If you’re looking for a super-straight effect I recommend working with a paddle brush.
Step 3 (Taming the texture)
Now we move on to the fun part! It is important to begin with the most curly/resistant part of the hair, for many, this is the bangs/fringe. Starting with this unruly section gives you greater control and leaves your bangs looking smooth and polished.
Tip: Make sure the roots are still really wet at this point; this will help the bangs to lay flat.
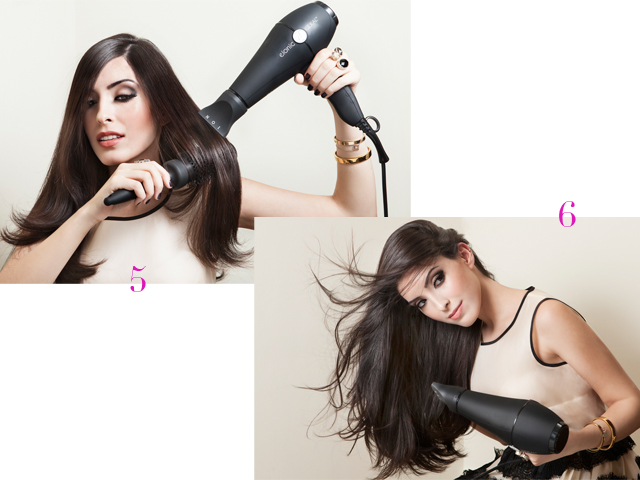
First I section-off the front of my hair using a tail comb and clip/tie the rest out of the way. Then, using the nozzle on the end of the hairdryer, I ensure the airflow is facing downwards and stretch my bangs from left to right – this ensures that I have control over where the part falls. The nozzle should follow the direction of the brush working downwards from the roots.
Step 4 (Rough dry & protect)
Now that my bangs have been tamed it’s time to move on to the rest of my mane. I let my hair completely down and use the dryer to remove some of the excess moisture. It is important to keep the dryer moving as this prevents the hair from becoming ‘patchy’. I then apply a small amount of my Argan Oil Serum to the middle and ends of my hair to smooth and protect. For better results I apply the serum after rough drying as the cuticle is open at this stage so the product is easily absorbed.
Step 5 (Section and dry – back)
Next I section my hair and, starting with the under layer at the back, begin to dry. I use my round brush to create tension and concentrate the airflow down the cuticle to smooth the hair. I only move on to a new section once I know that the roots are completely dry as they are the key to a long-lasting style. If you’re in need of a volume boost you can work with a volumizing product and hold the round brush, with the hair wrapped around, at the roots for a few moments whilst the hair cools. To really set the style I use the cool shot button on the dryer. For convenience I group the sections together as I dry, working my way up from the nape of the neck to the crown.
Step 6 (Section and dry – front)
Now I’m ready to start work on the sides. I create sections on the left and right sides and repeat the drying process I used at the back. It is important to distribute the hair evenly across the brush and maintain an even amount of tension.
Step 7 (Finishing touches)
To complete my blowdry I add a blast of cold air, this closes the cuticles and sets the style in place. For that on-trend ‘lived-in’ look I flip my hair over, remove the nozzle from the dryer and blast my hair – this creates definition.
Tip: To revive your blowdry the next day, take sections of your hair from the root then wrap them around the barrel of your round brush and roll up to the scalp. Hold your hair in place for a few seconds a give it a quick cold blast with the hair dryer to set in the volume. If your roots tend to be oily, rub some dry shampoo into them – this prolongs the life of your blowdry and adds volume to flat hair.