
HAIR TUTORIAL: World Cup hair.

The Dubai World Cup is coming up… and I’m getting you sorted and salon ready with this month’s hair tutorial…
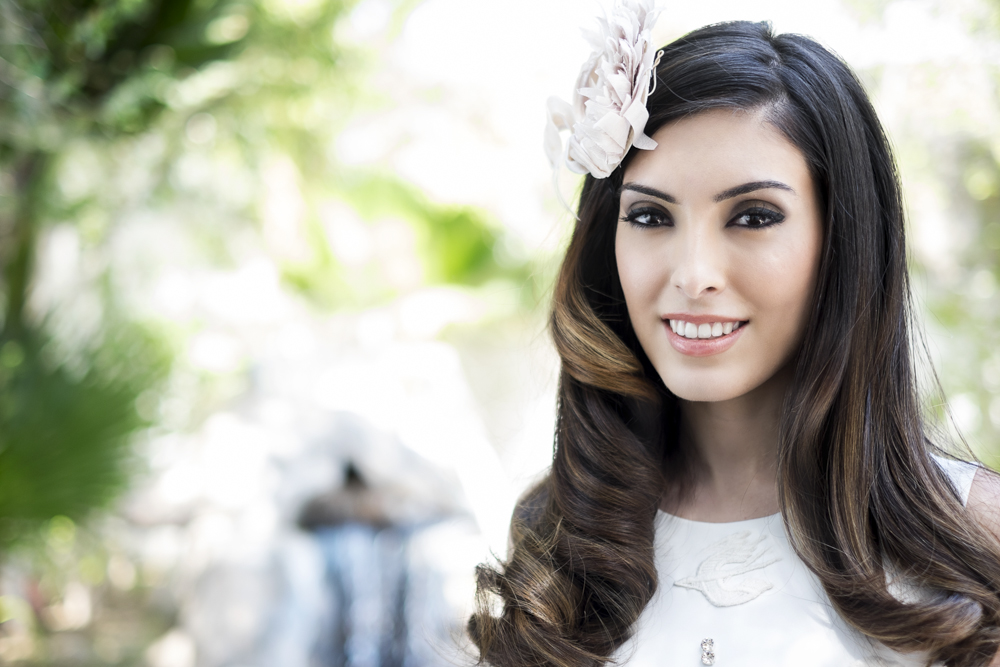
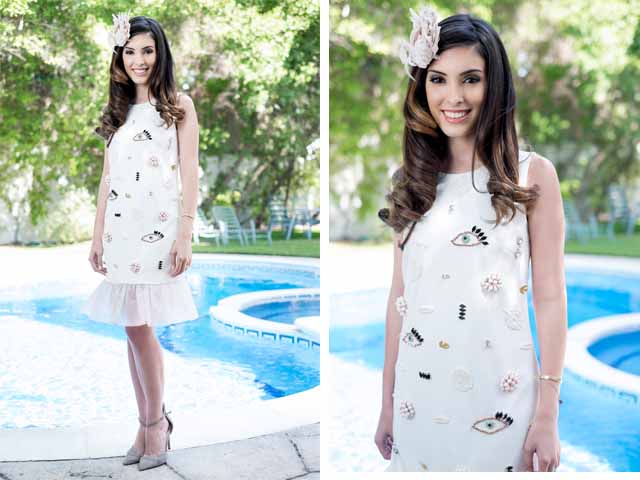
Dress by Zayan S/S’14 – available at S*uce
What you will need to complete the look:
Sectioning clips
Bobby pins
Lightweight styling lotion
Medium hold hairspray
Heat protection spray
Tail comb
Medium ceramic round barreled brush
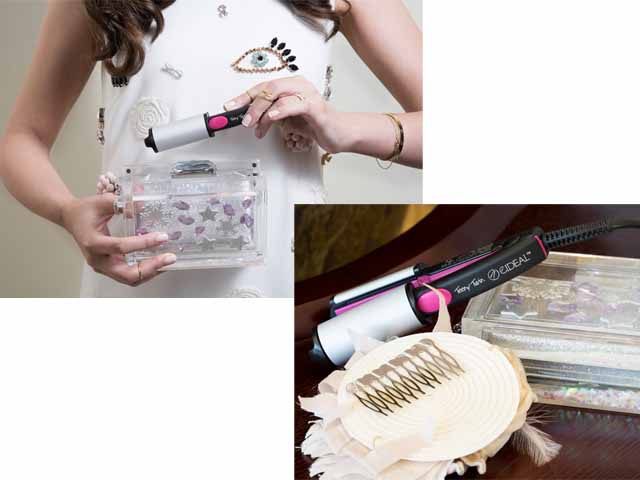
Small-barreled curling tong
A fabulous fascinator
The above tools are available from Eideal.
Preparation:
Forget the treatments:
Whilst I love to use deep conditioning treatments to nourish my hair they do have a tendency to weigh hair down and make it difficult to style. If you know you have a big event coming up make sure you leave a few days between the event and a deep conditioning treatment. If you’re planning to wear your hair curly opt for a lightweight conditioner to ensure your style doesn’t drop after a few hours.
Start with Second Day hair:
Whether you’re heading to the salon or attempting your own style it’s much better to begin with second-day hair! Super-clean and shiny hair is difficult to style and will create a slippery surface that might cause a hat or fascinator to slide out of place.
Tip: If you have oily hair – work a small amount of dry shampoo into the roots to absorb any excess oil.
Pillow plaits:
This is one of my favorite tricks to speed up the curling process! If I know I’m wearing my hair curly to an event the next day I braid my hair before bed and sleep with it in either one or two braids (depending upon the thickness of your mane). The next morning you wake up with ready-made waves that are the perfect texture to take a curling iron to!
Select the correct products:
People often make the mistake of weighing their hair down with excess product or creating stiff, unnatural, curls with an overdose of hairspray. Before you pick up your hair tools you need to prime your hair with lightweight styling lotion to create a matte texture for your tools to grip.
Tip: As with all of my tutorials, heat protection is a must before styling!
Work with the right tools:
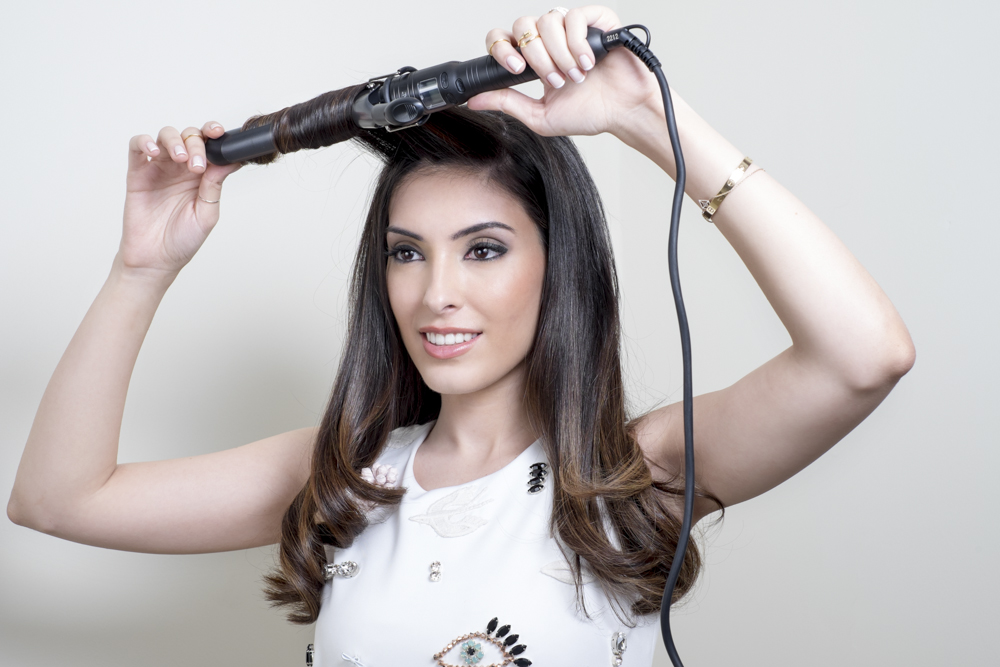
Whilst that old high street curling iron might have been your best friend during high school it might still be time to upgrade your tool kit! If your curls tend to drop out as the day goes on, it is worth investing in a professional quality curling iron like EIDEAL’s e-CURLER . Hair tools designed for salon use feature tourmaline technology and deliver effective, consistent heat to curl your hair from the inside out, without damaging your hair. Professional tools also tend to have a higher heat-up temperature in comparison to high street versions, which will really help to set your style in place.
Go small:
For curls that go the distance and last from day to night I advise working with a slightly smaller barreled curling iron than you usually do. This is because a smaller barrel produces a tighter curl, which will take a lot longer to fall out of shape.
Styling:
Step 1 (Curling and priming)
For this particular event I have decided to wear soft curls pinned to the side to compliment my dress and fascinator.
Tip: If your outfit features an embellished neckline or statement jewelry an updo will be most flattering, for a more simple neckline, wear chic curls or an elegant blowdry to enhance your look.
Using the steps I shared in my Glam Curls Tutorial I curl my whole head of hair and finish by misting the curls with a light hairspray to hold them in place. Once the hairspray has dried I use bobby pins to tuck away any stray hairs that fall around my face.
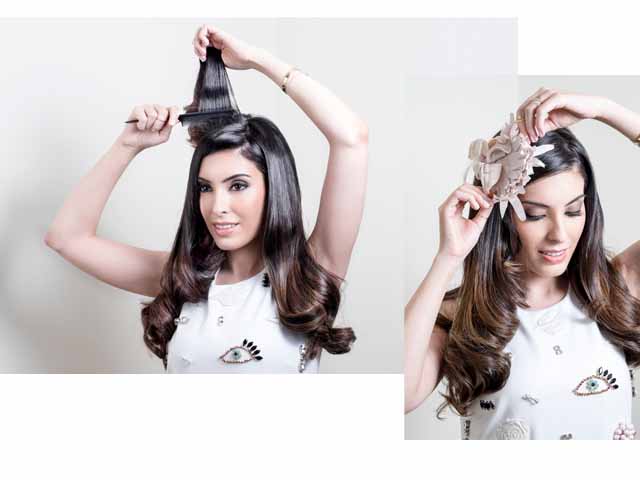
Now it’s time to decide where I want to place the fascinator. I part my hair to the chosen side to ensure that there is enough hair to hold the fascinator in place.
Tip: Sleek and finer hair types will want to create a strong and thick base for the fascinator to grip on to. To achieve this, lightly back comb the hair on the side you intend to place your fascinator and add a little hairspray before allowing it to dry for extra hold.
Step 2 (Fixing the fascinator)
Now my hair is styled and ready to hold the fascinator. If your chosen fascinator is on a fixed headband, choice of placement will be limited, the headband is designed to be discreet so simply prepare the hair by pulling it back away from the face, then add the fascinator and use bobby pins to fix the hair into place. The headband can be disguised using bobby pins to secure hair over the band. Fascinators that use a comb or clip like the one I am using can be placed wherever you like, but I generally find that styles worn slightly to the side are the most flattering and easy to wear.
Begin by gently pushing the comb in the opposite direction you want to wear it before sliding it into place. This technique will catch more hair in the comb’s teeth to ensure a firmer grip. Once in place, I lightly spritz hairspray onto the area surrounding the comb, being careful to avoid the fascinator itself. This helps the comb and hair stick together for added control.
Tip: For extra assurance or if you feel the comb is a little loose you can add a few bobby pins to secure the comb/clip in place.
Step 3 (Style maintenance)
By now your fascinator and curls should be well and truly set in place, but it’s always good to have a little extra guarantee! For peace of mind I pack my handbag with my hair and beauty essentials, this includes:
- Spare bobby pins
- Tail comb
- Travel size bottle of hairspray
- Teeny Twin mini flat/curling iron (for emergency touch-ups on the go)
Tip: Whilst at the event, it is important to remember to avoid touching or excessively combing your hair as this will cause your style to drop out faster.