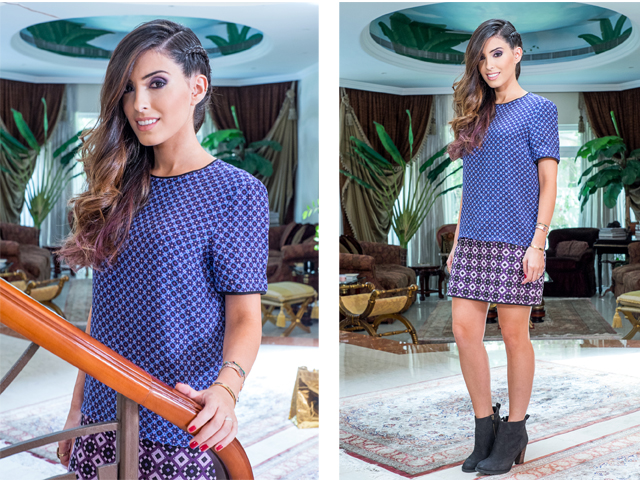
HAIR TUTORIAL: The Cara Braid
I’m wearing a Victoria Beckham dress & Timberland boots
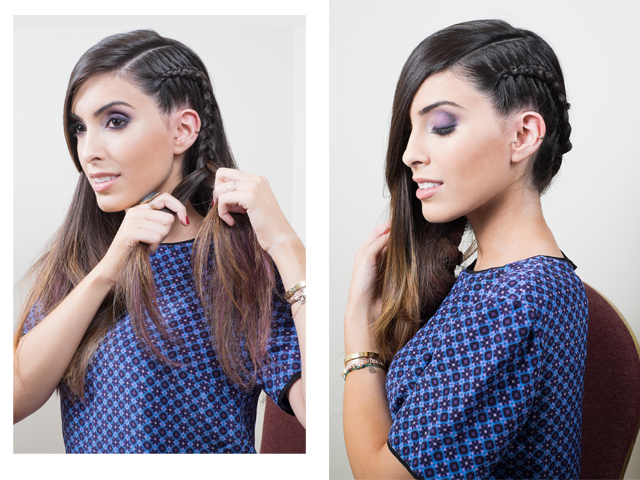
I’m a little obsessed with Supermodel, Cara Delevigne at the moment so we went for something inspired by Cara this month. 90s inspired undercuts have been creating a real stir recently, albeit in a more glamorous and wearable incarnation. The faux undercut – a style in which the shaved section is replaced by a tight braid – can be seen everywhere from the catwalk to the red carpet and has been worn by the likes of Kristen Stewart and Cara Delevingne. This style is one that can make the transition from daytime (where you can wear it to channel a festival vibe) to a glamorous, slightly edgy, evening style– perfect for the impending summer.
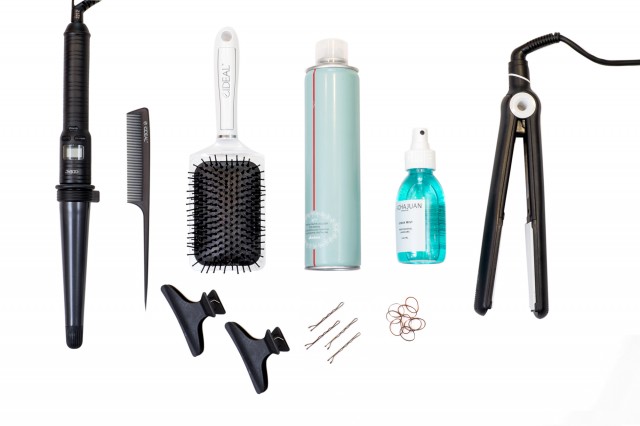
What you will need to complete the look:
Elastic Hair Bands
Bobby Pins
Heat Protection Spray
Davines hairspray
SACHAJUAN Sea Salt Spray
Sectioning Clips
Tail Comb
Paddle Brush
eROD Curling Wand
DiamonSilk Flat Iron
Step 1 (A Number ‘7’ Section)
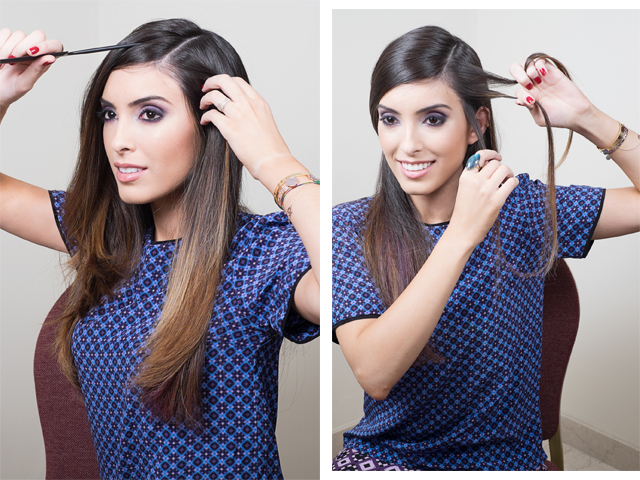
For this style I begin with clean, dry hair, if you have a naturally wavy texture – leave it alone! It will work well with this look! I start by using my Tail Comb to create a deep side parting. I then focus upon the side with less hair as this section will form the braided undercut.
Next, I use my Tail Comb to create another section running from the crown; straight down behind my ear (this will create a shape that resembles the number seven). I then clip the rest of the hair out of the way so I’m ready to style.
Tip: If you’re not sure where to place your parting, it should start in line with the arch of your brow.
Step 2 (Reverse French Braid)
Working with the ‘number seven shaped’ section I just created, I use my DiamonSilk Flat Iron to smooth out any kinks before taking three strands from the front and creating a tight Reverse French Braid. In case you’re not familiar with the difference between a regular French Braid and a Reverse French Braid I will explain. The Reverse French Braid (or Dutch Braid as it is sometimes known) is a modified French Braiding technique which gives a raised effect. The Reverse technique features alternate crossing of the two outer sections of hair UNDER the middle section rather than over.
Tip: If you’re still perfecting your braiding technique a regular French Braid will also work well with this tutorial.
Step 3 (Angle it down)
I continue my braid until I reach the point just behind my ear. I then begin to angle the braid downwards, following the number seven shape I sectioned off. Now, I start braiding regularly (without picking up any extra strands) until I get to my ends. I then tie the braid off securely with an elastic hair band.
Step 4 (Hide it)
To disguise the braid, I wrap the end underneath the rest of my hair towards the opposite side of my head, keeping it low, near the nape of my neck. I then use bobby pins to secure the style and keep the braid in place.
Step 5 (Wave it)
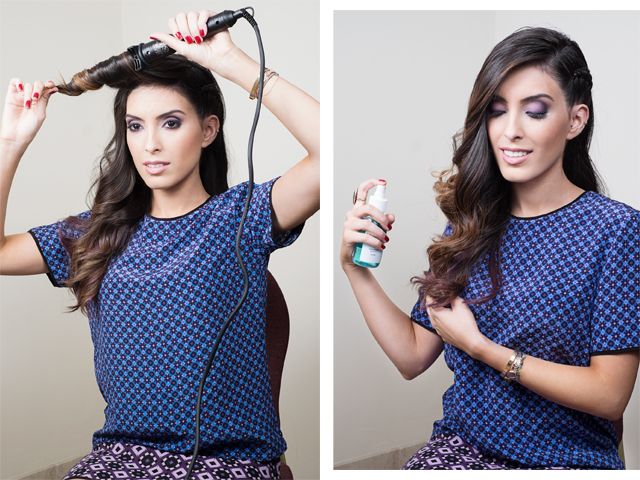
For that added edgy feel, I mist my hair with heat protection spray and use my Paddle Brush to quickly detangle before taking my eROD curling wand to the ends. I love this clipless curling wand because it gives me the curls I want without the creases left by a clip. eROD uses Nano-titanium and Nano-silver to lock-in moisture, leaving me with damage-free waves in just a few seconds! I simply pop on my heat-proof styling glove, wrap my hair around the barrel of the wand, (away from my face), hold for 5 seconds and release. Voila!
Tip: The curl will begin at the point where you start to wrap the hair. For loose, rock chic waves, I start by my ear to ensure the curls aren’t overly tight.
Step 6 (Secure it with Spray)
The final step gives my style staying power. Once my hair has cooled I spritz a little sea salt spray for added volume, texture and fullness.
Tip: To make this look super edgy, you can work some gel into the braided section to smooth it down and give the illusion of a real undercut.


